Almost all the pieces for the burner (I got one of the wrong taps, which I need to go get at Lowes along with the copper pipe)

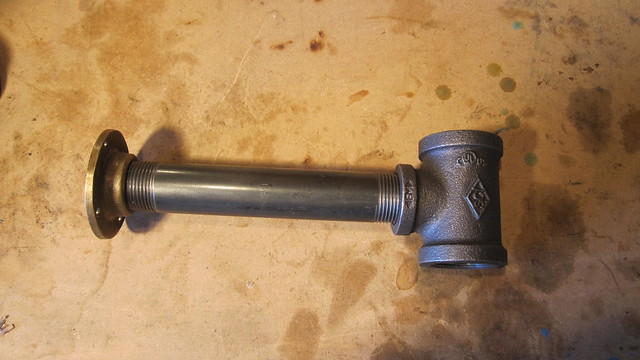
Here I already drilled the hole at the top of the "T". I also attached a
brass piece that I had in a box of fittings. I'm not sure what it is,
exactly, but I kind of acts like a flare and enables me to attach the
burner to the hole in the firebrick.
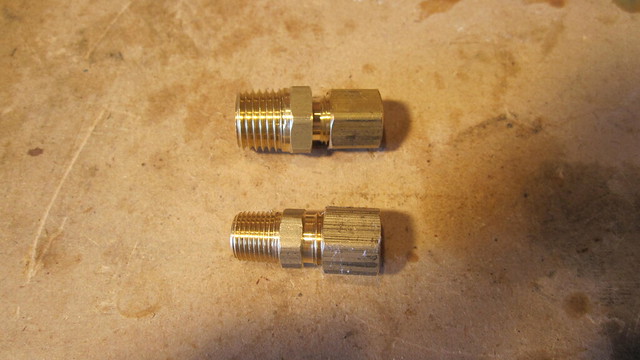
These are two different compression fittings. The top one is 1/4" MPT x
1/4" compression. The bottom one is 1/8" MPT x 1/4" compression. Why?
Scroll down.
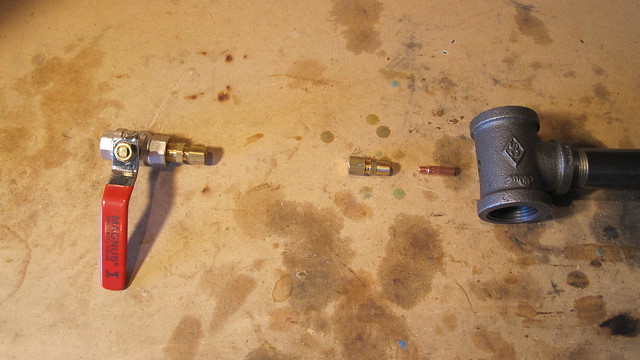
Here's the setup. From right to left:
Gas comes in through a
1/4" hose into the the
1/4" x 1/4" Ball Shut-off Valve
On the other side of the valve, there is the
1/4" MPT x 1/4" compression fitting
This attaches to the
1/4" copper pipe (Not shown--I don't have it yet)
The other end of the copper pipe attaches to the other
1/8" MPT x 1/4" compression fitting
The
0.035 MIG tipscrews into the tapped 1/8" MPT side of the 1/8" MPT x 1/4" compression fitting (Use 1/4-28 tap with a #3 drill bit)
The
1/8" MPT x 1/4" compression fitting then screws into the tapped "T" (Use 1/8-27 Tapered Tap)
For more information and if you need to ask any questions, go here:
http://www.iforgeiro...-and-made-this/
What's left to buy: Firebrick! (Regulator and hose are shipping. Should get them by next week)
Can't wait to get this burner up and running... building the forge should be the
really easy part.

Zachary


