Well, like the title says, I'm building a portable raised garden bed. Best of all, it's simple to make and super easy to move. It's the ideal urban garden solution. Let's get started!
If you don't have a chop saw like me, you can head over to your local big box store and get your wood cut. They're not super precise, and they charge about 50 cents per cut, but for our purposes the precision is good enough—and if it's your only solution, you have to do with what you got.
I used this plan for a raised garden bed as a template, and customized from there. I'm making a bed that's about 3' by 4' (or 36" by 48"). The structure is also going to be 3' high, and the actual bed, 14" deep.
Here are the specs:
Buy List:
2 – 2x4x12 – legs, small supports
1 – 2x4x8 – bottom supports
7 – 1x4x12 - “flooring”, part of siding (long), part of siding (small)
2 – 1x4x8 – part of siding (small), part of siding (long)
4 – casters
Landscaping fabric
Wood screws
Breakdown:
1 – 2x4x12 – legs
1 – 2x4x12 – small supports
1 – 2x4x8 – bottom supports
3 – 1x4x12 - “flooring”
2 – 1x4x12 – siding (long)
1 – 1x4x8 – siding (long)
2 – 1x4x12 – siding (small)
1 – 1x4x8 – siding (small)
Cut List (refer to the Breakdown list above):
Legs – 36” each – 4 pieces
Small Supports – 36” each – 4 pieces
Bottom Supports – 48” each – 2 pieces
Flooring – 48” each – 9 pieces
Siding (long) – 48” each – 8 pieces
Siding (small) – 40.62” each – 8 pieces
That's all for now,
Zachary
Tuesday, January 8, 2013
Tuesday, August 28, 2012
Burner Complete!
It has been a long time since I last posted. In fact, I already finished the burner many months ago. However, I thought I'd show you all how it works/looks. It's really hot here in Arizona, so I can't forge until winter time.
Thursday, January 5, 2012
Burner Almost complete
Almost all the pieces for the burner (I got one of the wrong taps, which I need to go get at Lowes along with the copper pipe)


Here I already drilled the hole at the top of the "T". I also attached a brass piece that I had in a box of fittings. I'm not sure what it is, exactly, but I kind of acts like a flare and enables me to attach the burner to the hole in the firebrick.

These are two different compression fittings. The top one is 1/4" MPT x 1/4" compression. The bottom one is 1/8" MPT x 1/4" compression. Why? Scroll down.

Here's the setup. From right to left:
Gas comes in through a 1/4" hose into the the 1/4" x 1/4" Ball Shut-off Valve
On the other side of the valve, there is the 1/4" MPT x 1/4" compression fitting
This attaches to the 1/4" copper pipe (Not shown--I don't have it yet)
The other end of the copper pipe attaches to the other 1/8" MPT x 1/4" compression fitting
The 0.035 MIG tipscrews into the tapped 1/8" MPT side of the 1/8" MPT x 1/4" compression fitting (Use 1/4-28 tap with a #3 drill bit)
The 1/8" MPT x 1/4" compression fitting then screws into the tapped "T" (Use 1/8-27 Tapered Tap)
For more information and if you need to ask any questions, go here: http://www.iforgeiro...-and-made-this/
What's left to buy: Firebrick! (Regulator and hose are shipping. Should get them by next week)
Can't wait to get this burner up and running... building the forge should be the really easy part.
Zachary
Here I already drilled the hole at the top of the "T". I also attached a brass piece that I had in a box of fittings. I'm not sure what it is, exactly, but I kind of acts like a flare and enables me to attach the burner to the hole in the firebrick.
These are two different compression fittings. The top one is 1/4" MPT x 1/4" compression. The bottom one is 1/8" MPT x 1/4" compression. Why? Scroll down.
Here's the setup. From right to left:
Gas comes in through a 1/4" hose into the the 1/4" x 1/4" Ball Shut-off Valve
On the other side of the valve, there is the 1/4" MPT x 1/4" compression fitting
This attaches to the 1/4" copper pipe (Not shown--I don't have it yet)
The other end of the copper pipe attaches to the other 1/8" MPT x 1/4" compression fitting
The 0.035 MIG tipscrews into the tapped 1/8" MPT side of the 1/8" MPT x 1/4" compression fitting (Use 1/4-28 tap with a #3 drill bit)
The 1/8" MPT x 1/4" compression fitting then screws into the tapped "T" (Use 1/8-27 Tapered Tap)
For more information and if you need to ask any questions, go here: http://www.iforgeiro...-and-made-this/
What's left to buy: Firebrick! (Regulator and hose are shipping. Should get them by next week)
Can't wait to get this burner up and running... building the forge should be the really easy part.
Zachary
Tuesday, December 20, 2011
Been a while!
Going on partial 2-week break from school. Meanwhile, I'm setting up my shop for blacksmithing. A really nice knifemaker gave me a piece of railroad track for an anvil. He also gave me some ceramic high-temperature Kaowool to line my gas forge, and a few pieces of high-carbon steel.
Zachary
| Anvil, piece of cable for "Cable Damascus" a.k.a pattern welding, and car leaf spring |
| Ceramic Kaowool |
| Partially filed surface for flatness |
Zachary
Sunday, September 25, 2011
Split and Out to Dry
So I decided to embark on splitting a log of sweetgum I had sitting in the garage for a few months to make a bow. It was going to be hard, but I didn't expect this much work. Took me about 3 hours. Right now, I sit exhausted in my computer chair typing. I'm taking advantage of the (hopefully) last week of high 90s to dry the de-barked log. It's going to be a flat bow--possibly Mollegabet design.
Zachary
| In case you were wondering, I used the butter knife to de-bark the wood. |
| Drying the elevated half because that's the one I'm planning on using. Next week I'll probably take the 14" bandsaw to it and split it in half down the its length. |
Zachary
Friday, September 16, 2011
Sheath
Almost completed sheath. Just needs a belt loop and I'm thinking about adding a wrap-around snap to secure the knife.
Used a tutorial (with google translate). Basically a front, spacer, and then back sewed together with dacron B50. Cuir-bouilli hardened leather. I soaked the sewn sheath in hot water (which I couldn't keep my hand in for more than a second or less) for about 10 min. Then I oiled my knife (I recomend waxing, because it still started rusting even with the oil on) and placed the knife into the sheath. I put the whole thing in my dehydrator set to 140F for about 1 hour. I think I pulled the knife out after 30 min. or so.
I dyed it black with a absolutely putrid smelling black vinegar dye I made. Man that stuff it nasty! I had to put the sheath outside for a few hours to get most of the smell out of it.
That's it for now!
Zachary
Used a tutorial (with google translate). Basically a front, spacer, and then back sewed together with dacron B50. Cuir-bouilli hardened leather. I soaked the sewn sheath in hot water (which I couldn't keep my hand in for more than a second or less) for about 10 min. Then I oiled my knife (I recomend waxing, because it still started rusting even with the oil on) and placed the knife into the sheath. I put the whole thing in my dehydrator set to 140F for about 1 hour. I think I pulled the knife out after 30 min. or so.
I dyed it black with a absolutely putrid smelling black vinegar dye I made. Man that stuff it nasty! I had to put the sheath outside for a few hours to get most of the smell out of it.
That's it for now!
Zachary
Tuesday, September 13, 2011
Knife Handle Progress
Some progress on the rasp knife I've been working on.
Toasted Osage Orange (Bodark) handle with blackened steel rivets. I blackened the steel by heating it up over the fire and then dunking them into some olive oil. Seemed to do the trick.
I recently drilled a small lanyard hole on the end that looks rather nifty.
Oh, and I'd like to hear your opinion on this variation? To me it seems to complete the handle, but what are your thoughts?
Next time, it'll be heat treating at the blacksmith's. I'll make sure to take some pictures of the process.
Zachary
Toasted Osage Orange (Bodark) handle with blackened steel rivets. I blackened the steel by heating it up over the fire and then dunking them into some olive oil. Seemed to do the trick.
I recently drilled a small lanyard hole on the end that looks rather nifty.
Oh, and I'd like to hear your opinion on this variation? To me it seems to complete the handle, but what are your thoughts?
Next time, it'll be heat treating at the blacksmith's. I'll make sure to take some pictures of the process.
Zachary
Thursday, July 21, 2011
How to Chop Wood Effectively (Short Video)
Not me chopping but the video was sent to me, so I thought I'd share with you.
Monday, July 4, 2011
An Amazing Young Archer
Wouldn't it be cool to be able to shoot like this guy? He's 14 years old. Wow...
Monday, June 27, 2011
It's Done!
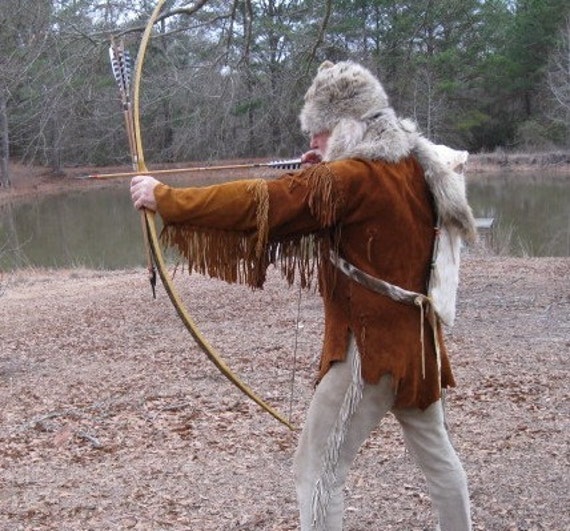
Well, I did not know for sure whether I would actually get to this point. I finished my 50 hour project. 48" nock to nock. About 50 pounds @ 25". I'm thanking my Creator for allowing me to create this from start to finish. Also, don't forget the kind man who let me have a fresh green limb of his bodark tree.
Hey don't feel like you gotta unsubscribe either, I have some other plans for projects I'll be posting here.
~ Zachary
| My draw was a little high here, trying to rush to get it before the camera's self timer went off. |
Hey don't feel like you gotta unsubscribe either, I have some other plans for projects I'll be posting here.
~ Zachary
Friday, June 24, 2011
Tilling Progress
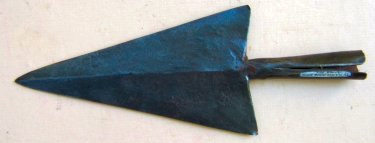
After quite a long wait for some time, I've gotten started tillering the bow--that is--making the bow bend in an equal arc. It basically all boils down to this: take off wood where it isn't bending, and don't take off any where it already is. It's a lot harder than it looks. Right now I'm at 20" and it's very good weight-wise, but I want to get 24-28" draw which means I'll have to pull farther. That means the draw-weight will go up. Since it's pretty much already tillered, I need to take wood off slowly and evenly to slowly bring it down. Another couple days of good work and I should be done tillering. After that, I'll do the final touches and wrap the handle with leather. Next, I'll make some hand-forged steel broadhead arrows, most likely with an integral socket versus a tang.
| Integral Socket is a socket that fits on the arrow and is glued in place. |
| This arrow has a tang on the end that is fit into a split arrow shaft and wrapped with sinew. |
Tuesday, June 21, 2011
Thursday, June 16, 2011
Hook Pick - WIP
While I'm finishing up my knife, I've also started (and almost finished) a hoof pick for my sister. If you're not sure what that is... well, it's just a pick to clean out a horse's hoof. Unlike my knife, I forged this out of a short triangular piece of cut-off from my rasp knife. All I have to do now is normalize it a couple times (heat it up to critical temperature 800F and let it cool). Then I have to heat it to critical and quench it in light oil, polish it, temper it with the blow torch and finish it up.
Tuesday, May 31, 2011
First Rasp Knife - WIP
Here's my first Knife made out of a Safe Sharp rasp. I cut almost the whole knife out with a hacksaw. It doesn't have an edge on it yet. I hope to sharpen it and put a handle on it soon. Most of the file marks will also come out. It's approx. 8.5 inches long.
Friday, May 27, 2011
Bow Form is Done
My bow form is pretty much completed. Since I have a whole week off of pretty much all school, I'll be working on my bow quite a bit, so be ready for more posts very soon.
My bow form--properly called a "Caul" allows me to bend the bow in the opposite direction than it would normally bend, giving it even more speed and poundage when drawn.
Wednesday, May 18, 2011
Blacksmithing - Using my Homemade Forge (Videos)
| My Homemade Forge! |
So here are some videos of the process of finding out if a piece of metal is hardenable and therefore able to keep an edge whether it be a knife or an arrowhead, etc.
Labels:
arrow,
arrowheads,
blacksmith,
fire,
forge,
homemade
Monday, May 16, 2011
A good Osage Bow was Worth a Horse and a Blanket
In Arkansas, in the early 19th century, a good Osage bow was worth a horse and a blanket. - Wikipedia

Wednesday, May 11, 2011
Weapons that Made Britian: The Longbow
Awesome videos that my cousin, Micah, told me about. Enjoy!
Saturday, April 23, 2011
Linen-backed Red Oak Bow
I recently made a red oak board bow backed with linen. It's approx. 40-50# @ 28". I still need to get myself some decent arrows. It's really just a "Pre-bow" so I don't mess up tillering on my nice one that I'm making from osage. Since this one is made from a board, it didn't take me long, helped me get some practice tillering, and if I messed up wouldn't be that much of a deal considering I only spent about 4 or 5 hours on it. :)
Wednesday, April 13, 2011
Burning Osage Orange
A little video comparing burning osage wood versus a bit of white ash wood (I think). I love the orange flames, the smell of the smoke, and the crackling sounds... it just is soo relaxing.
Subscribe to:
Posts (Atom)